

Start Your Blog in 5 Minutes With WordPress
Ever wanted to start a blog, but weren’t sure how to set it up? WordPress is the way to go, and it’s not as complicated as you think. In a few quick steps, we’ll show you how to set up your hosting account and install WordPress. You’ll be blogging in no time!
Choose A Web Host
There are many hosting companies out there, but for a WordPress site, Bluehost is one of the best options. Bluehost is the only hosting service officially recommended by WordPress and has been the number-one recommended hosting service for their platform for almost 10 years. Here’s why:
- Premium customer service, reliability and usability
- Easy-to-use control panel
- Custom-built servers to provide the most stable and reliable hosting environment
- Quickly get started with our one-click WordPress install provided by MOJO Marketplace
- Expert, in-house technical support provided 24 hours a day, 7 days a week
- Unlimited websites, email accounts, and domains – all on one account at an affordable price
- No gimmicks, no contracts. Enjoy the comfort of a 30-day money back guarantee and the option to cancel at any time.
As if that weren’t enough, if you sign up through this tutorial, you’ll get shared hosting at $3.95/month for 36 months and a free domain name for a year!
To set up your hosting account with Bluehost, follow the steps below.
Set Up Your Hosting Account
To get started, go to Bluehost’s home page and click “Sign Up Now.”

Then choose a domain name for your site. If you already own a domain name, you can enter it here, and you will just have to go through a few extra steps to make sure you get your DNS pointed to Bluehost. If you don’t already have a domain name, you can purchase one from right in the sign up process. It comes free with your new WordPress hosting account purchase.
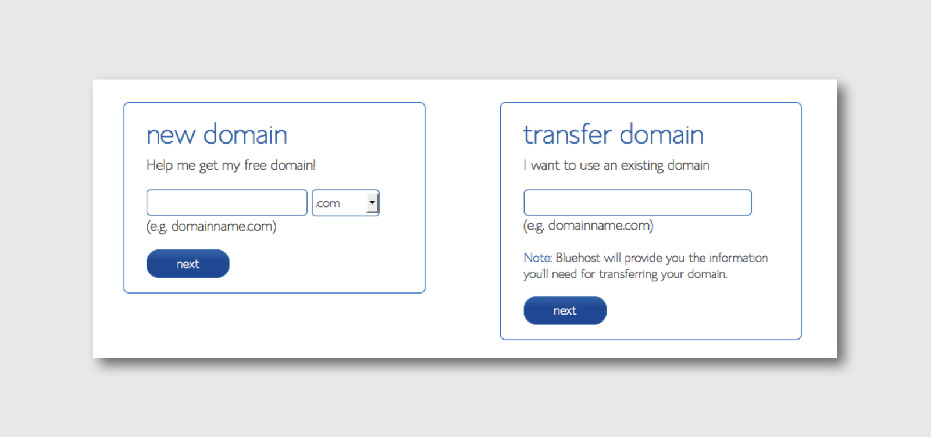
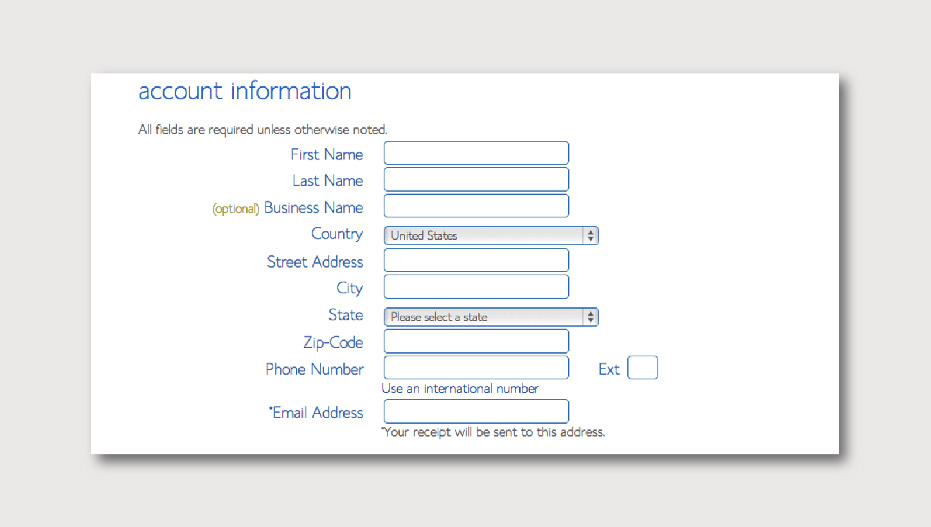
Enter your domain name and fill in your personal information.
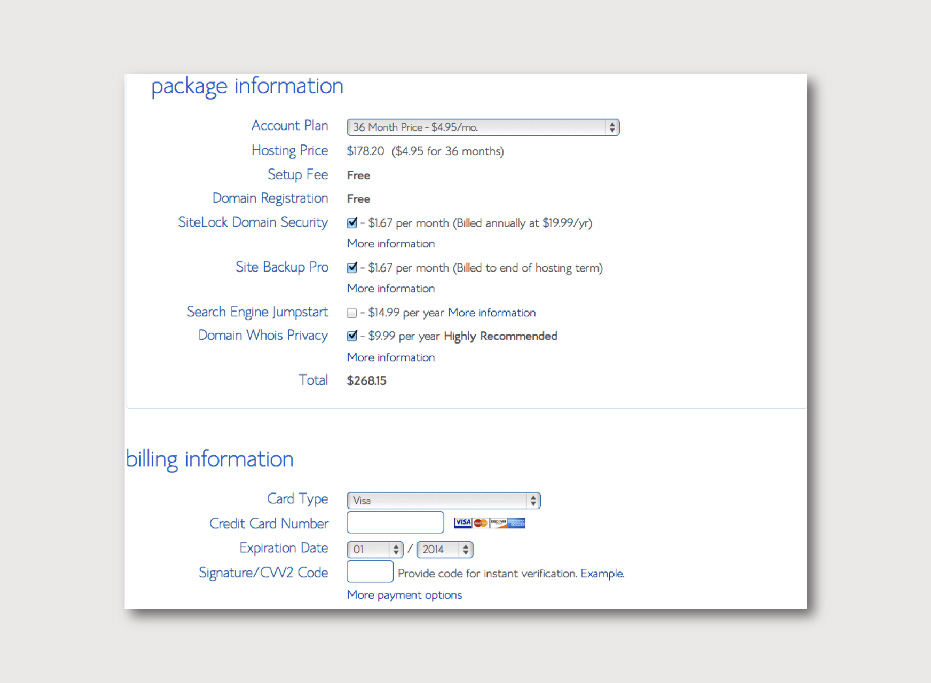
Next is the fun part: choosing which hosting package you want! Normal, shared hosting is priced at 12, 24 and 36-month terms. The longer term you purchase, the lower the monthly rate will be. For example, by choosing a 36-month hosting term, you get the an introductory rate of $3.95/month. And, because you’ve chosen to host with Bluehost, if you ever need more than a shared hosting account, Bluehost provides seamless upgrades to VPS or dedicated server hosting accounts from inside your control panel.
Click the “Next” button to complete your purchase, and create a password for your account. You can use the Password Generator to create one, or fill it in yourself. It is required to have both capital and lowercase letters, a number, and a special character (?!#, etc.) in order to have a strong enough password to protect your account.
You did it! You’re all signed up! Now it’s time to install WordPress.
Installing WordPress
This may seem like the most complicated step, but Bluehost has worked hard to make this one of the easiest things for you to do by using the new MOJO Marketplace. In your cPanel, scroll to the section titled “MOJO Marketplace” and choose the “One-Click Installs” button. This will take you to a page inside MOJO Marketplace called Scripts and Platforms. The blog section is at the very top, so all you have to do here is click on the WordPress icon.
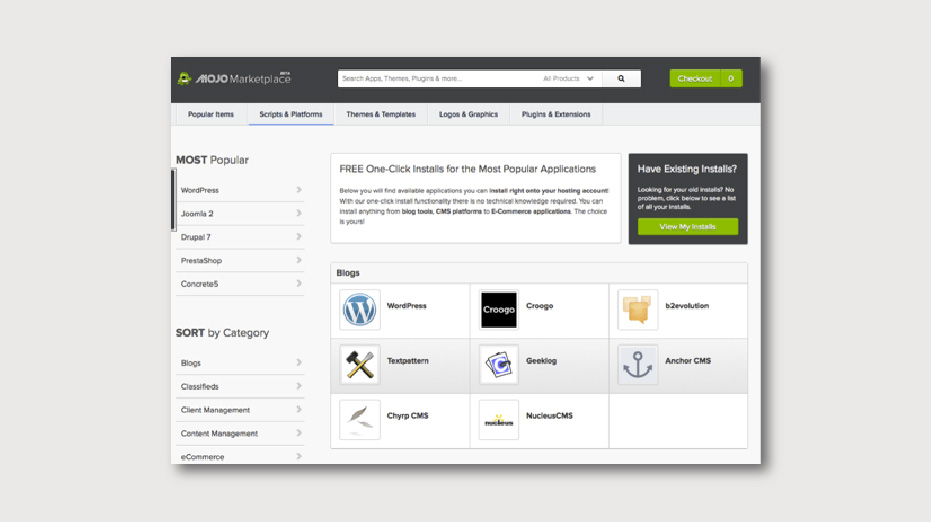
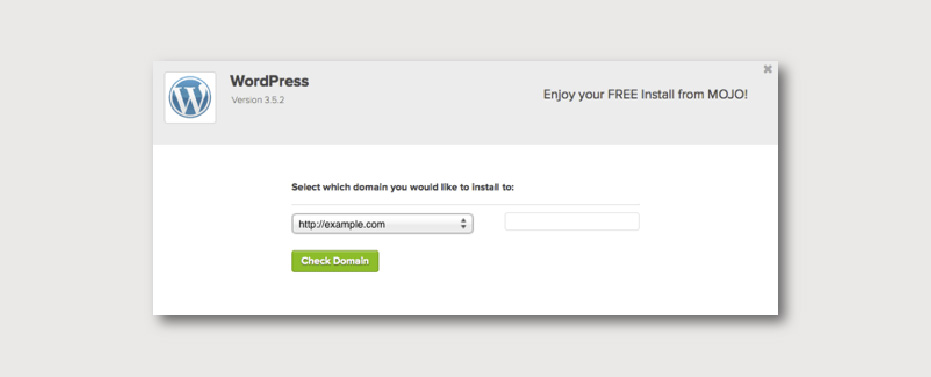
This will open the installation window. Click on the green “Start” button that will start the WordPress installation process, which has a few easy steps.

Step 1: Choose where you want to install WordPress. This can be any domain on your account, or a subdomain or a folder for one of your domains. Next, click on “Check Domain,” which will make sure the domain is assigned and pointing to your account. You may get a warning that you are overwriting files, but as long as you don’t have another website built yet, you can check the box and continue. This is mostly to make sure that you really want to install in that location. If you do have other sites built, you will want to make sure you’re not overwriting something important.
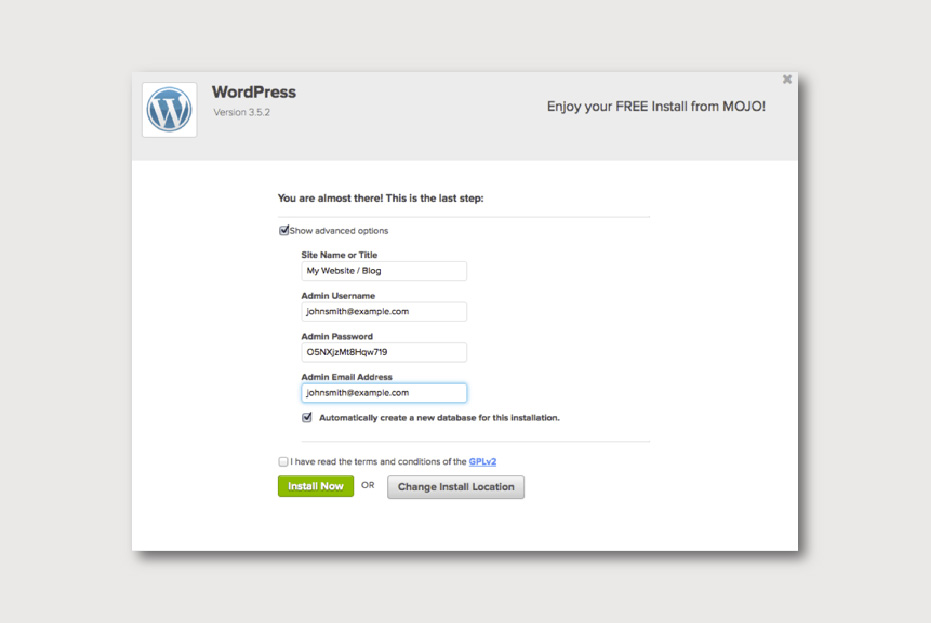
Step 2: Show Advanced Options. This section allows you to set up your own username and password for your WordPress install. IT is recommended to use a different username than “admin” and a very strong password. Make sure that the “Automatically create a new database for this installation” box is checked, unless you have a database already set up that you want to use.
Step 3: After you’ve read the terms and conditions, check the box indicating that you’ve done so, then click “Install Now.”
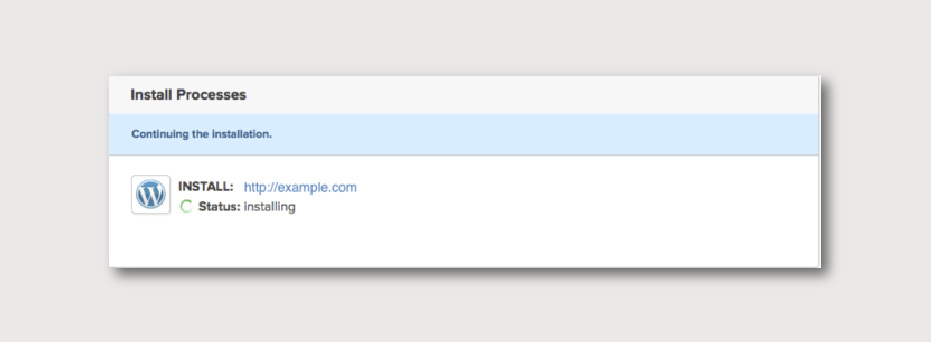
Then watch the progress bar as WordPress is installed! Once it’s fully installed, it will provide you with your site URL, the admin login URL, your username, and password. You will get a copy of this information, except your password, in your email as well. Don’t lose it!
Now you can log into your WordPress site by going to the admin login URL. Enter your username and password, then click “Log In.” This will take you to your WordPress dashboard. From here, you can create pages, write posts, change the appearance, and control everything else about your new site.
Need More Help?
For visual learners, this video on how to install WordPress might help: https://bluho.st/sfvBT
Good luck and happy blogging!